- Home
- Technology
- How to integrate Paystack paym ...
In today’s digital age, providing convenient and secure payment options on your website is crucial for businesses to thrive. Paystack, Nigeria’s leading payment gateway, offers a seamless solution for accepting online payments. This article will guide you through the process of integrating Paystack into your website, empowering you to provide a smooth and hassle-free payment experience for your customers.
Step 1: Sign up and Create an Account
To get started with Paystack, visit their website at www.paystack.com and sign up for an account. Fill in the necessary details and verify your email address. Once your account is created, you’ll gain access to Paystack’s dashboard, where you can manage your transactions and settings.
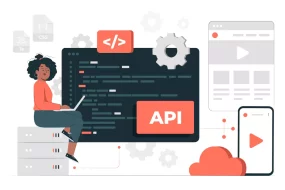
Step 2: Obtain API Keys
To integrate Paystack into your website, you’ll need to obtain API keys. API keys act as a secure communication channel between your website and Paystack. In your Paystack dashboard, navigate to the “Settings” tab and click on “API Keys.” Here, you’ll find your test and live API keys. Initially, use the test API keys to ensure everything is functioning correctly. Once you’re ready to go live, switch to the live API keys.
Step 3: Install Paystack Plugin or SDK
Paystack offers plugins and SDKs for various platforms and programming languages, making integration a breeze. If you’re using a popular content management system (CMS) like WordPress, Shopify, or WooCommerce, search for the Paystack plugin in the respective marketplace. Install and activate the plugin, then enter your API keys in the settings section. This will link your website to Paystack.
For custom websites or specific platforms, visit the documentation section (https://developers.paystack.co/docs/) to find the appropriate SDK or integration guide. Follow the provided instructions to install and configure the SDK into your website’s codebase.
Step 4: Implement Payment Buttons
Once the plugin or SDK is successfully installed, it’s time to add payment buttons to your website. This allows customers to initiate transactions and make payments easily. The platform provides customizable payment buttons that can be embedded on any page of your website. These buttons can be created and configured through your dashboard. Select the desired button style, specify the payment details, and generate the button code. Insert the generated code in the appropriate section of your website.
Step 5: Test and Go Live
Before making it live on your website, it’s crucial to thoroughly test the integration to ensure a seamless payment experience for your customers. The platform provides a test mode that allows you to simulate transactions without processing actual payments. Make use of this feature to test various scenarios and ensure that everything is functioning as expected.
Once you’re satisfied with the testing results, switch to the live mode in your dashboard and update your website’s API keys accordingly. Double-check that all necessary configurations, such as callback URLs and webhook settings, are properly set up to receive transaction notifications.
Conclusion
Integrating Paystack payment gateway into your website empowers you to accept online payments securely and efficiently. By following the steps outlined in this article, you can seamlessly integrate Paystack into your website, enabling your customers to make payments with ease.
With Paystack’s robust features and user-friendly interface, you can focus on growing your business while providing a convenient payment experience for your customers.
Ready to integrate Paystack like a pro? Our team of experts is here to help you seamlessly integrate Paystack payment gateway into your website. Get in touch now and elevate your online payment experience!